Whether you’re new to whittling or looking to improve your skills, mastering the art of carving a simple stick can be a rewarding experience. Sticks can serve as the foundation for more intricate projects, or become unique keepsakes on their own.
In this article, we will guide you through the process of whittling a stick step by step, providing helpful tips and advice along the way.
Selecting the Perfect Stick

Selecting the perfect stick is essential to create a beautiful and functional whittled masterpiece. In this section, we will cover the importance of size and length, as well as the type and hardness of the wood.
Size and Length
First, consider the size and length of the stick. The ideal size depends on what you plan to create. Here are some general guidelines:
- Small projects: Choose a stick that is around 1/2 to 1 inch in diameter and 6 to 8 inches in length.
- Medium projects: Select a stick with a diameter of 1 to 2 inches and a length of 8 to 12 inches.
- Large projects: Look for a stick that is 2 inches or more in diameter and at least 12 inches long.
Wood Type and Hardness
Next, consider the wood type and hardness. Some woods are easier to carve than others.
For beginners, it’s best to start with a softer wood that is easier to carve. Experienced whittlers may enjoy the challenge of harder wood. Here are some common wood types and their hardness levels:
| Wood Type | Hardness |
|---|---|
| Basswood | Soft |
| Pine | Soft |
| Cedar | Soft |
| Maple | Hard |
| Oak | Hard |
When selecting your stick, make sure it is free of knots and cracks, as they can make the carving process more challenging. Once you have found the perfect stick, you are ready to begin whittling.
Gathering Your Whittling Tools
Before you can start whittling a stick, it’s essential to gather the necessary tools and supplies. This section will guide you through choosing the right wood carving knife, as well as introduce you to some additional tools and supplies that can enhance your whittling experience.
Choosing a Knife
A sharp, reliable knife is a whittler’s most important tool. When selecting a wood carving knife, consider the following factors:
- Blade size: A small blade (1-1.5 inches) is ideal for intricate work, while a larger blade (2-3 inches) is useful for removing more material quickly.
- Blade shape: A straight-edged blade is versatile and suitable for most whittling projects. A curved blade, on the other hand, can provide more control for detail work.
- Handle material: Choose a comfortable handle made of wood, rubber, or a similarly durable material to ensure a secure grip.
- Safety features: A locking mechanism or a folding design can help prevent accidental injuries during use.
There are some great pocket knives for whittling available on the market. The benefit of these is they are foldable and easy to carry with you.
Additional Tools and Supplies
While a good knife is the primary tool for whittling, having some extra tools and supplies can be helpful. Here are a few recommendations:
| Tool/Supply | Purpose |
|---|---|
| Carving gloves | Protect your hands from accidental cuts and improve grip. |
| Sharpening stone | Maintain the sharpness of your knife for precise cuts. |
| Sandpaper | Smooth any rough edges and add a finished look to your project. |
| Pencil and paper | Sketch out your design and plan your cuts. |
With the right tools and supplies in place, you’ll be well-prepared to tackle your whittling project and create a beautifully carved stick.
Preparing the Stick for Whittling
Before you start carving your stick, it’s essential to prepare it properly. This not only makes the whittling process smoother but also ensures the finished product looks clean and professional. In this section, we will cover the steps needed to prepare your stick for whittling, including removing bark, sanding, and smoothing.
Removing Bark
First, you’ll need to remove the bark from the stick. This is crucial because the bark can be tough to carve, and it may also contain dirt, insects, or other debris. To remove the bark, follow these simple steps:
- Take a sharp wood carving knife and make a shallow cut around the top and bottom of the stick, approximately 1-2 inches from the ends.
- Starting at the top, use the knife to peel away the bark in long, steady strokes. Be careful not to cut too deep into the wood.
- Continue removing the bark until you’ve exposed the entire stick, making sure to maintain an even pressure for a smooth result.
Sanding and Smoothing
After you’ve removed the bark, the next step is to smooth out any rough areas on the stick. This will make it easier to carve and create a more polished finished product. Here’s how:
- Using medium-grit sandpaper (around 100-grit), work your way along the stick, sanding down any bumps or rough patches.
- Switch to a finer-grit sandpaper (around 220-grit) and continue sanding the stick, focusing on any lingering imperfections.
- Wipe the stick clean with a damp cloth to remove any dust and debris left by sanding.
- Examine the stick for any remaining imperfections and sand as needed until you’re satisfied with the smoothness.
Once you’ve completed these steps, your stick should be clean, smooth, and ready for whittling. Remember, proper preparation is essential for achieving the best results in your finished carving.
5. Whittling Techniques and Safety Tips
Here, we will discuss a few fundamental principles to keep in mind when whittling, as well as some safety tips to ensure a secure and pleasant experience.
Basic Cuts
The three primary cuts to practice when whittling are the straight cut, the V cut, and the thumb push cut. Each cut serves a different purpose and can create various shapes:
- Straight cut: Also known as the push cut, it is used to remove material and create flat surfaces.
- V cut: Made by cutting two straight lines that meet at a point, it’s ideal for carving grooves and details.
- Thumb push cut: Using your thumb as leverage, this cut allows for more control and precision when removing material.
How to Hold Your Knife
Properly holding your knife ensures control and precision. Here are two basic grips you can use while whittling:
- Pencil grip: Hold the knife like a pencil, with your fingers near the blade for added control.
- Fist grip: Grasp the knife handle with your entire hand, providing more power for larger cuts.
Protective Gear and Safe Practices
Wearing protective gear and following best practices can prevent injuries while whittling:
- Gloves: Wear cut-resistant gloves to protect your hands from accidental nicks or cuts.
- Thumb guard: A leather thumb guard can protect your thumb from the blade when using the thumb push cut.
- Cutting direction: Always cut away from your body and maintain a secure grip on both the knife and the material.
By implementing these techniques and safety tips, you can enhance your whittling experience and create beautiful works of art.
Step by Step: Whittling a Stick
Creating the Basic Shape
Choose a suitable stick with an even diameter and a length proportional to your project. Ensure it’s free of knots and dry for ease of carving.
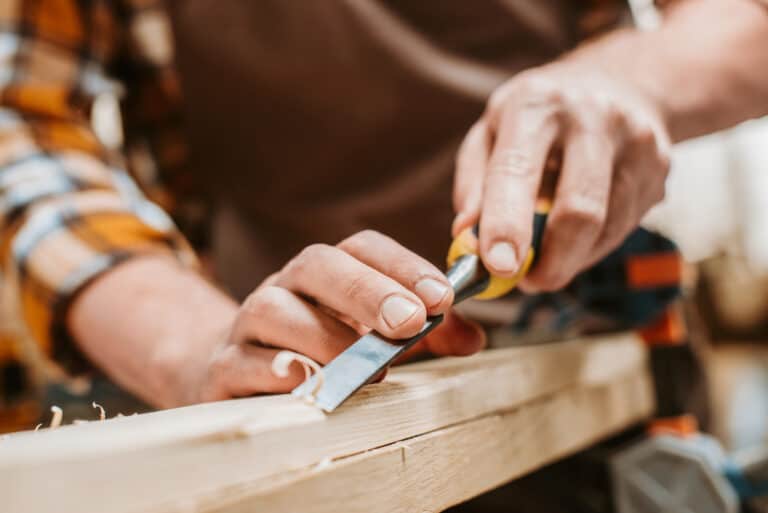
Using a sharp whittling knife, carefully shave the bark off the stick by holding the knife at a slight angle and pushing away from your body. Remember to keep your fingers clear of the cutting path.
Sketch the design on the wood with a pencil. This will serve as a guide during the whittling process.
Create the rough shape of the project by cutting away small wood chips along the pencil lines. Cut with the grain to avoid splitting the wood, and maintain a steady grip on both the knife and wood.
Adding Details
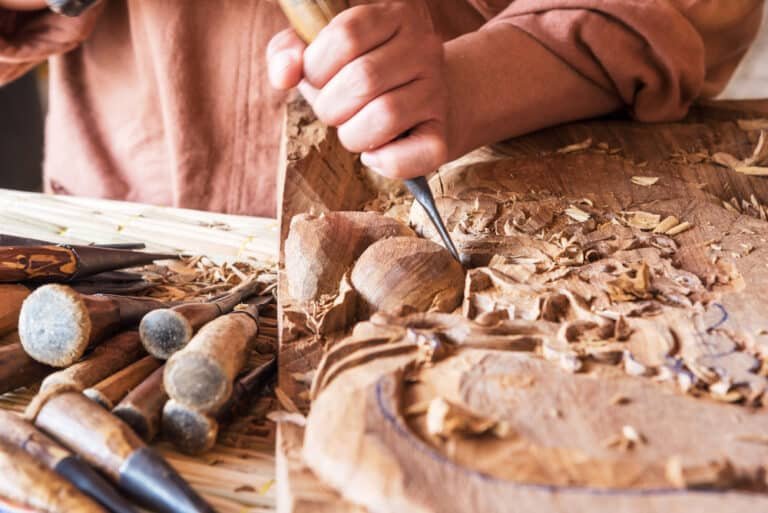
Once you achieve the basic shape, add intricate details to your design. Small V-shaped cuts, grooves, and notches can create texture and dimension.
For refined detailing, consider using whittling tools like gouges and chisels. Always work slowly and cautiously to avoid unintended damage to the wood or injury.
Keep in mind that wood carving is an art form that takes practice, so don’t worry about achieving perfection on your first attempt. As you gain experience, you’ll develop better control and finesse.
Finishing Touches
Smooth out rough areas using sandpaper with varying grits, starting from coarse to fine. Sand with the grain until the surface is smooth to the touch.
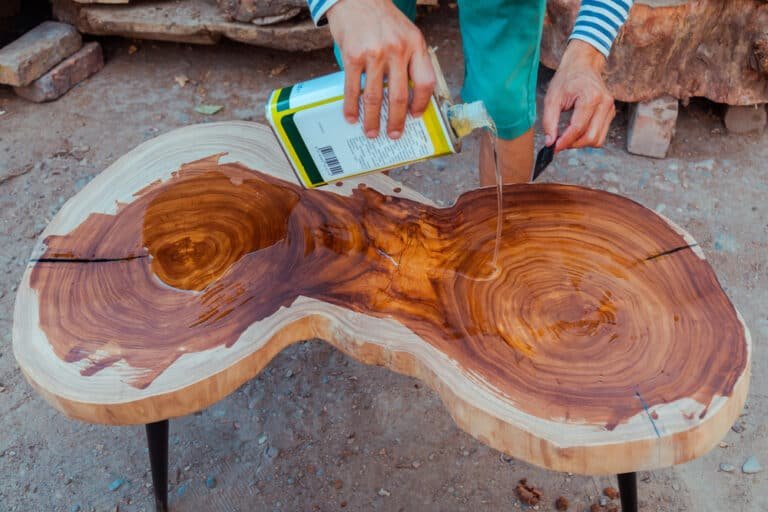
You may apply a wood finish, such as tung oil or beeswax, for added protection and to enhance the natural beauty of the wood. Use a clean rag or brush to apply the finish evenly on the wood.
Allow your project to dry completely, following the instructions on the chosen finish. Once dry, your whittled stick is ready for display or use in your next project.
Finishing and Preserving Your Whittled Stick
After completing the whittling process, it’s important to properly finish and preserve your stick to ensure its longevity and protect your hard work.
Staining and Painting
Choose your desired finish, whether it’s staining or painting your whittled stick. Staining will enhance the natural wood color, while painting allows you to add a personalized touch. Whichever you choose, follow these steps:
- Select a well-ventilated area to work in
- Arrange your materials, such as paintbrushes, stains or paints, and a drop cloth
- Apply the stain or paint evenly with a brush, working in sections
- Allow the stick to dry for the recommended drying time on the product label
- Add additional coats if needed for desired coverage
Sealing and Protecting
Sealing your whittled stick is essential to protect it from elements like moisture, dirt, and accidental damage. Follow these steps to properly seal and protect your stick:
- Choose a sealant, such as polyurethane, varnish, or a natural oil finish
- Prepare your workspace and materials, including brushes, sealant, and a drop cloth
- Apply the sealant in thin, even coats with a clean brush
- Allow the stick to dry between coats for the recommended drying time
- Apply additional coats until the desired level of protection is achieved
Following these guidelines will help ensure your whittled stick remains a lasting and visually appealing piece of craftsmanship.