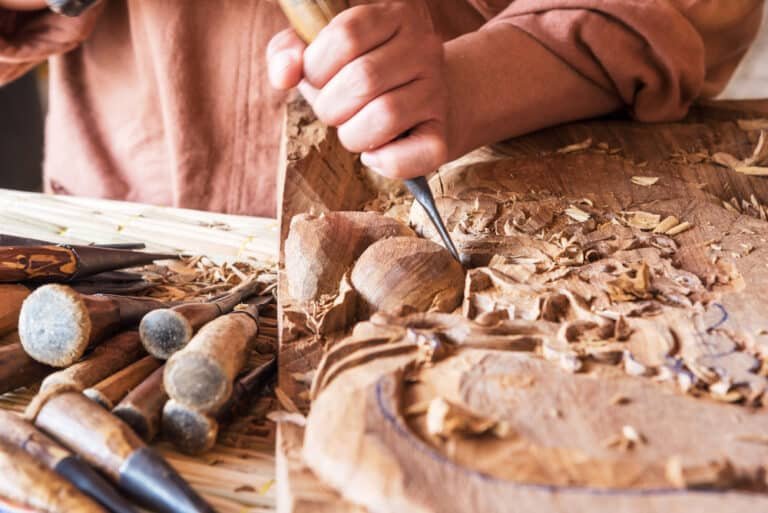
Sometimes wood is just too hard to carve. But don’t worry, you can soften the wood to make it ready for carving.
Below I have listed out 10 methods you can use.
- Alcohol Spray: A mixture of alcohol and water sprayed onto the wood helps to soften it by reducing the surface tension of the water, allowing it to absorb more easily into the wood.
- Soaking in Water: Submerging the wood in water for a period of time can evenly distribute moisture throughout it, making it softer for carving.
- Boiling in Water: Boiling wood in water is a quicker way to hydrate it, although it comes with drawbacks such as the potential to change the wood’s color or make it too soft.
- Storing in a Humid Environment: Keeping wood in a humid environment can prevent it from drying out too much and becoming harder to carve.
- Using Freshly Cut Wood: Freshly cut wood naturally contains moisture, making it softer and easier to carve.
- Using Air Dried Wood: Air dried wood tends to be softer than kiln-dried wood because it retains some natural moisture.
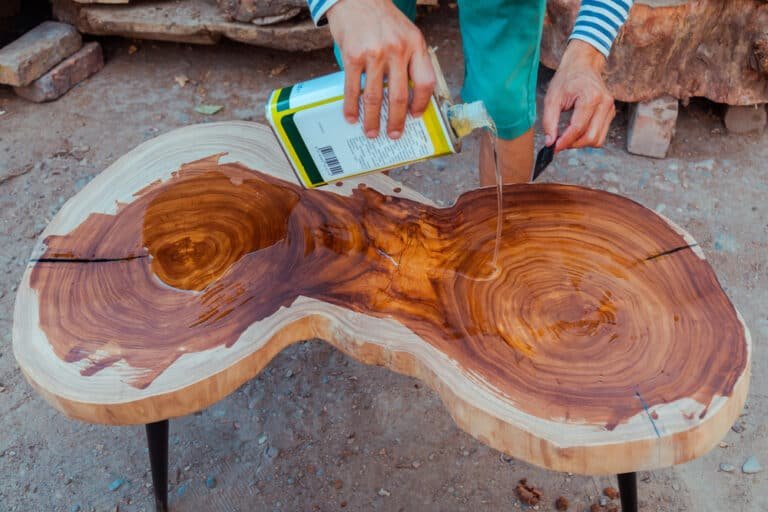
- Applying Mineral or Baby Oil: These oils can soften the wood for carving and also act as a finish to protect the carving.
- Applying WD-40: This can quickly soften the wood for carving, but it is not food safe and should only be used for display pieces.
- Using Odorless Paint Thinner: This can help to soften the wood by promoting absorption, but it should be used with caution due to potential health hazards.
- Soaking in Low Odor Kerosene: Kerosene can soften the wood effectively, but it should be used in a well-ventilated area and kept away from open flames.
Read on for full explanations and tutorial for each method.
Looking for some tools? See our list of the best wood carving tools on the market right now.
10 Ways To Soften Wood for Carving
1. Spray Water And Rubbing Alcohol On The Wood
Using a 50/50 alcohol-water solution will help to soften up the wood.
- Mix 70% alcohol with water in a spray bottle.
- Shake the bottle well to create a consistent solution.
- Spray the solution evenly onto the surface of the wood. Make sure to cover every inch, especially the parts you plan on carving.
- After applying the solution, give it some time to soak into the wood fibers. This usually takes around 10 to 15 minutes, but feel free to wait a bit longer if necessary.
- Once you notice that the wood has become noticeably softer, you can begin carving with ease.
Remember to work in a well-ventilated area when using the alcohol spray, as the fumes can be strong. Keep a cloth nearby to wipe off any excess solution during the carving process. And always wear eye protection and gloves when handling alcohol to protect yourself from any accidents.
2. Soak the Wood in water
The process of soaking wood in water is a simple and effective way to soften it for carving. This technique introduces moisture into the wood fibers, making them more pliable and easier to work with.
To get started, you’ll need a container large enough to hold the wood pieces you’re working with.
Fill the container with water, fully submerging the wood. The soaking time will vary depending on the size and type of wood, but typically you should leave it for a few hours at least, or even overnight.
Keep in mind that soaking wood for too long can cause it to warp or crack, so be cautious not to overdo it. It’s essential to monitor the wood’s progress and remove it from the water when it reaches the desired level of softness.
After soaking, gently pat the wood dry with a clean towel or cloth and leave it to air-dry for a short period. This step is crucial, as it helps prevent any potential damage to the wood surface while you work on your project.
You Might Like: How to Cut a Square Hole in Wood
3. Boiling Wood In Water
To start, you’ll need a large pot and some water. Fill the pot with enough water to cover the piece of wood you want to soften. Heat the water until it reaches a rolling boil.
Place your wood piece in the boiling water, making sure it is fully submerged. The boiling process helps to break down the wood fibers, making the piece more pliable and easier to carve.
Keep in mind, that the time required for the wood to soften depends on the size and type of wood. It can take anywhere from a few minutes to a couple of hours.
While you wait, it’s important to monitor the boiling process closely. If the water level starts to decrease, feel free to add more water to ensure your wood remains submerged.
Once the wood reaches your desired level of softness, use a pair of tongs to remove the piece of wood from the boiling water carefully.
After removing the wood, allow it to cool down to a safe temperature before handling it. Keep in mind that using this method may cause the wood to become more susceptible to cracking or other damage.
To mitigate this, be gentle when carving and avoid applying excessive pressure as you work.
4. Store the Wood In A Humid Environment
When working with wood for carving, it’s important to consider the environment in which you store it. Storing wood in a humid environment can actually help to soften the material, making it easier to work with.
One way to achieve this is by placing your wood in a room with a higher humidity level, such as a basement or a closed-off space with a humidifier. This will help maintain a consistent level of moisture in the air, allowing the wood fibers to relax and soften over time.
However, it’s crucial to not overdo the humidity. If the environment is too damp, it can lead to issues such as fungus growth or rotting wood.
To avoid these problems, ensure that the humidity levels remain within a safe range—ideally between 50-60%. An inexpensive humidity monitor can be a helpful tool for managing these conditions.
Rotate the pieces from time to time. This ensures that all areas of the wood have a chance to benefit from the moisture in the air, promoting even softening throughout.
5. Using Freshly Cut Wood
One of the simplest ways to make wood carving easier is to use freshly cut wood. Green wood, which is wood that has been recently cut and still retains moisture, tends to be softer and more pliable than seasoned wood. This makes it more responsive to your carving tools and allows for smoother cuts.
When selecting a piece of green wood, remember to choose one that is free of knots and imperfections, as these can interfere with your carving process. Keep in mind that working with green wood can be a bit messier, as there is a higher chance of sap and moisture being released as you carve.
As you work with freshly cut wood, it’s essential to keep your tools sharp and clean. This will ensure that your cuts are precise and help prevent splitting or splintering. If you find the wood is drying out and becoming more challenging, consider using a water-alcohol mixture to soften the wood again.
Moreover, it’s crucial to practice proper wood storage and maintenance techniques to prevent your green wood from drying out too quickly. Storing the wood in a cool, damp place or wrapping it in a moist cloth can help maintain its softness for a longer duration. Sometimes, sealing the ends of the wood with wax or a wood sealer can also prevent it from drying too fast.
6. Using Air Dried Wood
When working with wood for carving, it’s essential to choose the right kind of wood. One option you might consider is using air-dried wood. Air-dried wood has undergone a natural process and can be easier to carve than kiln-dried wood. Here, we’ll discuss how to select and prepare air-dried wood for carving.
First, when acquiring your wood, make sure to choose a piece that’s been exposed to air and gradual moisture changes for a considerable amount of time. This allows the wood to lose moisture naturally, reducing the chances of cracks and creating a more stable structure.
It’s important to know that air-dried wood can still have some moisture content which may vary depending on the environment and type of wood.
Before you start carving, you’ll need to prepare your air-dried wood. Begin by inspecting the piece for any cracks, knots, or imperfections that could affect your carving. You may need to remove bark, clean the surface, or sand it to achieve a smooth canvas for your project.
As you start carving, keep in mind that air-dried wood is generally more gentle on your knife, allowing you to make controlled cuts and fine details. However, you may encounter harder areas within the wood, depending on its moisture content and density. If necessary, you can try methods like using an alcohol and water spray or applying kerosene to soften these areas.
7. Applying Mineral Or Baby Oil to wood
One effective method to soften wood for carving is by applying mineral oil or baby oil. Mineral oil acts as a stabilizer when exposed to heated temperatures, preventing wood from deteriorating.
To begin, ensure you have a clean, soft cloth or a brush to apply the oil. First, clean the surface of your wood to remove any dirt or debris as this will help to ensure even oil coverage. Next, generously apply the oil to the wood using your cloth or brush, making sure to cover all areas evenly.
The mineral oil absorption process can take some time, which means you might need to wait days before starting your carving project.
If you plan on using baby oil, the process is similar to using mineral oil. The primary difference is that baby oil often has a lighter consistency, which may affect absorption speed and ease of application.
8. Applying WD-40

Applying WD-40 to your wood is a simple and effective way to soften it for carving. As a water-displacing spray, it penetrates the wood fibers and provides a little extra flexibility. To get started, follow these steps.
- Ensure that your wood is clean and free from any debris or dust. This will help the WD-40 penetrate more effectively.
- Grab a can of WD-40 from your local store or you can order it online.
- You’ll need a clean cloth or rag to apply the WD-40.
- Spray a generous amount of WD-40 onto the cloth or rag. You want to make sure that the cloth is saturated but not dripping.
- Gently apply the WD-40 to the wood, rubbing it evenly across the surface. Be sure to cover all areas that you plan to carve.
- Allow the WD-40 to sit on the wood for at least 15 minutes. This will give the solution enough time to penetrate the wood fibers, making them more pliable. Too long and the wood may become too soft.
Once the wood has rested, you’re ready to start carving. You should notice a difference in how easily your carving tools glide through the wood, saving you time and effort. Remember to work cautiously, as the softened wood may be more susceptible to splitting or breaking if too much force is applied.
9. Using Odorless Paint Thinner to soften wood
To start, you’ll need to gather your supplies – a container large enough to hold the wood, odorless paint thinner, gloves to protect your hands, and a clean cloth or brush. Make sure you’re working in a well-ventilated area, as fumes from the paint thinner can still be harmful even if they’re odorless.
- Begin by pouring enough paint thinner into the container to cover the wood completely.
- Carefully submerge your wood piece in the liquid. Allow the wood to soak for a few hours or until it becomes noticeably softer.
- Soaking duration may vary depending on the wood’s thickness and hardness.
After the soaking process is complete, put on your gloves and take the wood out of the container. Use the clean cloth or brush to gently remove any excess paint thinner from the wood’s surface. It’s essential to let the wood dry completely before you start carving, as the presence of paint thinner could interfere with your tools or make the carving process more challenging.
Remember, while using odorless paint thinner, always prioritize safety first. Wear protective gloves and ensure you have proper ventilation.
10. Soaking wood in Low Odor Kerosene
Soaking your wood in low odor kerosene is one effective way to soften it for carving. To do this, you’ll need a container large enough to hold the wood and kerosene. Keep in mind that safety should be your top priority when working with kerosene; make sure you work in a well-ventilated area and keep fire sources away.
- Begin by submerging the wood in kerosene, ensuring it’s entirely covered. If the wood floats, you can use a weight to keep it submerged.
- Leave the wood to soak for about a day or two, depending on the size and hardness of the material. During this time, the kerosene will penetrate the wood fibers, making them much easier to carve.
- Once the soaking time has elapsed, carefully remove the wood from the kerosene container and allow it to dry. Let any remaining kerosene evaporate before you start carving, as working with damp or wet wood can lead to blunted tools, and the kerosene can affect the wood’s finishing and staining.
Remember that using kerosene to soften wood may slightly alter the material’s color or introduce a subtle odor, so it’s crucial to consider whether these changes might affect your wood carving project’s final appearance.