Are you thinking about adding a Dremel to your wood carving toolkit? The type of wood you choose can significantly impact the final result.
My favorite woods for dremel carving are cherry, mahogany and walnut. I find the hardness of these woods allows for detailed carving. For beginners, basswood is probably your best bet. It is soft, allowing you to carve easily and hone your skills.
In this article, I will share some of the best woods for Dremel carving to help you achieve the perfect finish for your next project.
Popular Woods for Dremel Carving
Cherry
Cherry wood is one of the best choices for dremel carving projects. It’s a hardwood known for its deep reddish-brown color and even grain pattern. Since it’s moderately hard, cherry holds up well and allows for detailed carving.
I enjoy working with cherry because the smooth surface makes it easy to achieve a polished finish.
Walnut
Walnut wood is a popular choice. It’s a hardwood with a rich brown color and swirling grain pattern that gives each carving a unique look.
Walnut’s hardness makes it suitable for creating precise cuts and details. I also appreciate that the wood’s natural oils provide a smooth finish to the final product.
Mahogany
I really enjoy carving with mahogany. It has a beautiful reddish-brown color, a straight grain pattern, and medium hardness.
This combination makes it ideal for creating intricate details. Mahogany is also relatively light, making it easier to handle when working with a Dremel.
Basswood
Basswood is one of the easiest woods to work with.. It’s a soft yet fine-grained wood, perfect for intricate details and smooth, clean cuts. It’s lightweight and easy to handle, which adds to the appeal of basswood for Dremel carving projects.
Aspen
Aspen is another softwood that works well with Dremel tools. Its pale color and fine grain structure make it popular.
I find that aspen is easy to work with, allowing for precise cuts and fine detailing. Although it’s not as popular as basswood, you should definitely consider it.
Related: I’ve listed out my top woods for carving here.
Factors to Consider When Choosing Wood
In this section, I’ll share my insights on key aspects to pay attention to while choosing the ideal wood.
Wood Hardness
As I’ve learned, the hardness of the wood significantly will significantly impact your experience.
I suggest starting with softer woods like basswood, birch wood, limewood, pine, willow, or horse chestnut, as they’re easier to carve.
As your skills progress and you become more experienced, incorporate harder woods such as cherrywood, mahogany, and walnut.
Wood Grain and Texture
The wood’s grain and texture make a difference in how a carving turns out.
Wood with straight or closed grains is easier to carve, while wood with stingy or curly grain texture is more challenging. This is why I recommend Basswood for those new to Dremel carving.
Additionally, remember that the aesthetics of the final piece are affected by the wood’s color and grain pattern.
When selecting a woodblock, I look for one with an even grain pattern, as it ensures more consistent cuts and better results.
Cost and Availability
I am also mindful of the cost and availability of the wood I choose for my projects.
Some woods can be pretty expensive or hard to find. I often opt for a wood set prepared specifically for wood carving to save time and money.
Green wood or Dry wood?
While green wood is easier to carve, it tends to warp and crack as it dries, which can compromise the integrity of the finished piece.
On the other hand, dry wood is more stable but can be more challenging to carve. I typically choose dry wood for projects requiring long-lasting durability and refined details.
Preparing the Wood
The type of wood we choose can significantly impact our outcome. In this section, I’ll explain how to prepare the wood for carving, ensuring an enjoyable and efficient experience.
Selecting the Right Size
It’s essential to select a piece slightly bigger than the final design, allowing room for errors and adjustments. Also, ensure that the wood isn’t too thick.
Sanding and Smoothing
Once you have your wood, it’s time to sand and smooth the surface. I like to start by using coarse grit sandpaper to remove any rough edges or imperfections. Progressing to a finer grit sandpaper, I gradually smooth the wood until it has a consistent texture.
I ensure to sand with the grain of the wood, as this helps to avoid scratches and maintain a professional appearance. A well-prepared surface enhances the final product’s appearance, making the carving process more enjoyable and efficient.
Techniques and Tips
In this section, I will share some techniques and tips to help you excel at Dremel wood carving. It’s important to know how to hold the Dremel, master a few carving techniques, and understand your projects’ finishing and polishing process.
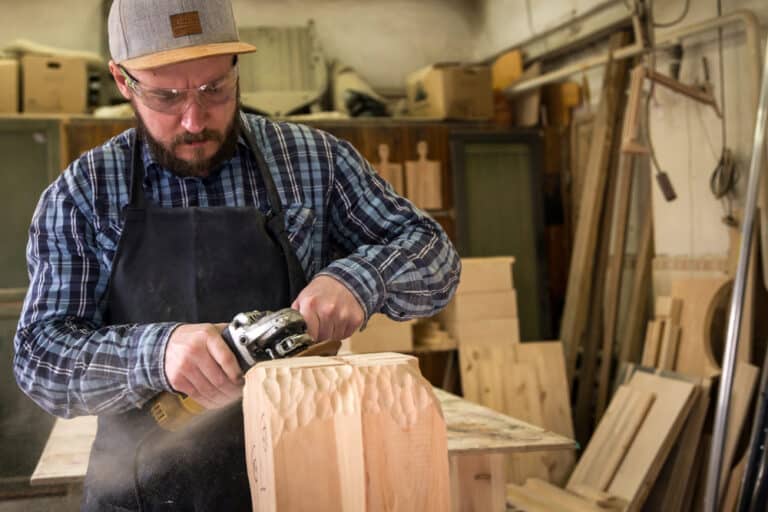
Holding the Dremel
Hold the Dremel like a pencil or a pen for better control and precision. Ensure you have a comfortable grip and your hand is steady. Keeping your hand relaxed is critical to reducing fatigue during extended carving sessions.
Carving Techniques
Carving wood with a Dremel involves various techniques, and the following are some helpful tips:
- Choose the right bit: Selecting the appropriate Dremel bit for your project is critical to achieving the desired results. Fluted carbide bits are probably the most popular option.
- Practice on scrap wood: Before carving your main project, practice the techniques and test the bit speed on a scrap piece of wood.
- Carve with the grain: Always carve toward the wood grain to avoid tearing or splintering.
- Work slowly: Carving wood requires patience and control. Work slowly and carefully to avoid mistakes or damaging your project.
Finishing and Polishing
Once you’ve completed the carving process, the finishing and polishing phase begins. Creating a smooth surface and ensuring your project looks professional is essential.
Start by sanding your carved piece using progressively finer grits of sandpaper. This will help to remove any remaining rough edges and prepare the surface for polishing.
After sanding, apply a wood finish of your choice, such as oil or varnish, to protect and enhance the appearance of your project.
Lastly, polish your carving with a soft cloth or use a polishing bit on your Dremel for a glossy finish.
By following these techniques and tips, I’m confident you’ll improve your skills and create beautiful, intricate wood carvings using a Dremel.