Olive wood is good for carving because it is durable, holds detail well, won’t split and has a smooth finish. Olive wood has a beautiful color and interesting grain patterns, making it an attractive choice for decorative pieces.
| Pros of Carving Olive Wood | Cons of Carving Olive Wood |
|---|---|
| Highly prized for hardness and durability | Difficult to carve because of its hardness and density |
| Straight and uniform grain pattern, meaning it will react predictably to carving | Challenging to work with, can chip or break easily |
| Attractive appearance that enhances with age | Unworkable with manual whittling knives when dry |
| Inviting fragrance | Typically requires power tools for carving |
| Natural oils prevent severe cracking and splitting |
See our list of the best woods for carving.
Unique Characteristics of Olive Wood

Hardness and Grain
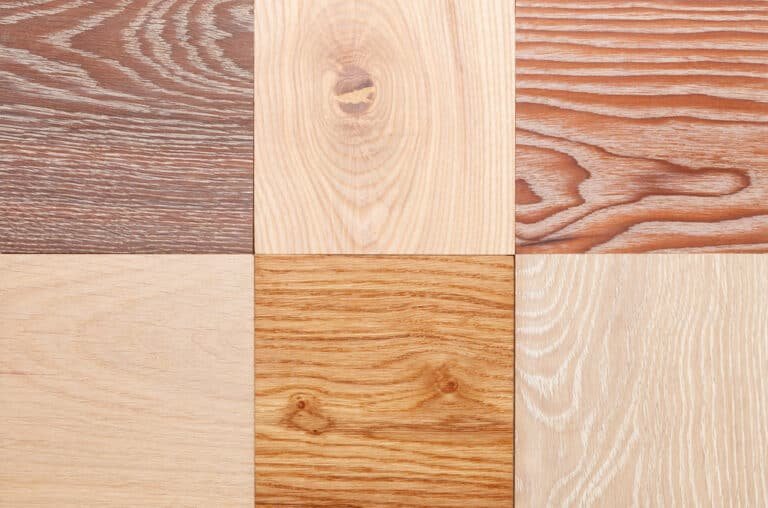
Olive wood is renowned for its hardness and straight grain, making it very durable. It has a uniform grain pattern with warm hues that range from creamy yellows to darker golden-browns. The straight grain pattern means that it will react very predictably.
Aesthetic Appeal
Olive wodo is unique for its beautiful grain pattern and becomes even more attractive over time, as it darkens, enriches, and enhances in color as it ages. Additionally, it has an inviting fragrance that adds to its appeal.
Oil Content
The grain of olive wood is saturated with natural tree oils, which help to prevent the wood from severely cracking and splitting as it dries out, a common issue in wood carving.
Difficult to Carve
Due to its hardness and density, olive wood can be difficult to carve. It’s one of the hardest woods available, which can make it challenging to shape without causing chipping or breaking off pieces. Olive wood is best for intermediate and advanced carvers, beginners will struggle with it.
power Tool Requirements
While olive wood is easier to carve than some other woods, once it dries, it becomes very hard and is unworkable with manual whittling knives. Therefore, carving olive wood typically requires power tools such as Dremel’s and lathes.
Advantages of Carving Olive Wood
- It is a hardwood, meaning it can withstand the wear and tear of carving tools without splintering or cracking.
- Its dense grain also allows intricate details to be easily carved into the surface.
- Olive wood has an attractive grain pattern that adds visual interest to any project.
- Another advantage of using olive wood for carving projects is its natural resistance to decay and rot. This makes it ideal for outdoor sculptures or other pieces exposed to the elements over time.
- Olive wood also has excellent fire-resistance properties, making it suitable for indoor and outdoor applications.
In addition to its physical characteristics, olive wood offers a range of aesthetic benefits too:
- Many artists and craftspeople love the unique grain patterns in Olive wood; they look stunning when combined with other materials, such as metals or stone accents.
- Olive woods come in various shades ranging from light browns to dark reds, adding further depth and texture when combined on one piece of craftsmanship – perfect if you’re looking for something truly unique.
- Olive trees grow relatively slowly compared to other species like oak or maple. Their timber tends to have fewer knots than faster-growing varieties, resulting in smoother surfaces that require less sanding before finishing your project with paint or varnish if desired.
Olive wood is an excellent choice for carving because it is lightweight, durable, and easy to work with. However, there are some disadvantages that we will cover below.
Disadvantages of Carving with Olive Wood
Olive wood can be difficult to carve because of its hardness and density. Olive wood is one of the hardest woods available, making it challenging to work with.
It has a high density which makes it difficult to shape without chipping or breaking off pieces. The grain of olive wood also tends to run in different directions, making it more difficult for carvers to control their tools when working on intricate details.
Sharpening Tools: One disadvantage of carving with olive wood is that sharpening tools can be tricky. The hard surface requires special sharpening stones or diamond-coated files that are specifically designed for use on harder woods like olivewood.
If you don’t have access to these specialized tools, you may have difficulty getting your blades as sharp as they need to be to cut into the dense material effectively and safely.
Time-Consuming: Carving with olivewood can also be time-consuming since the hard surface takes longer than softer woods such as pine or basswood when being carved by hand or machine tools.
This means that projects will take longer than expected if not planned out properly beforehand, so make sure you give yourself plenty of time before starting any project involving this type of material.
Dust & Chippings: Another issue associated with carving olivewood is dust and chippings created during the process; due to its hardness, small particles tend to fly off while cutting, which could cause breathing problems if proper safety measures aren’t taken such as wearing protective gear (e..g masks).
In addition, these tiny chips can get stuck in crevices and other tight spaces, leading to complications if not promptly removed.
While olive wood is a beautiful and unique material for carving, it can be difficult to work with due to its density.
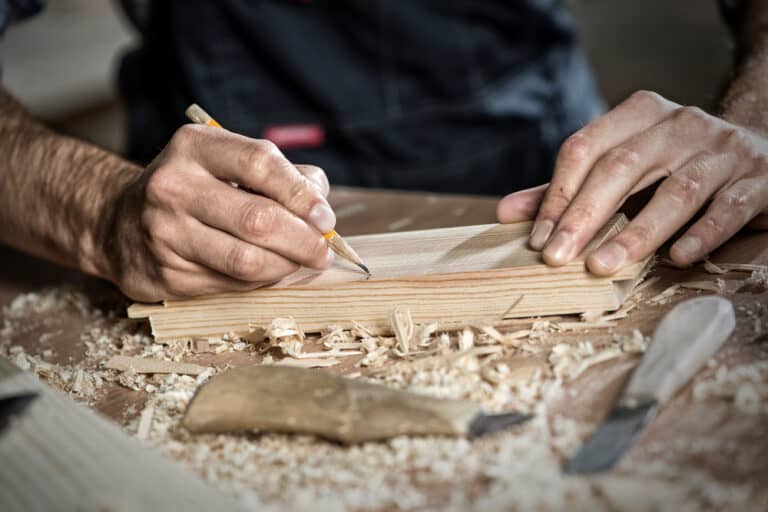
Tips for Carving Olive Wood
- Preparation: Soak the wood in denatured alcohol for about a week to make it easier to carve and to minimize the risk of cracking.
- Drying: After soaking, allow the wood to re-dry slowly. This helps in preventing the wood from cracking or checking.
- Carving Method: Start by carving the wood in an abstract form before moving on to more detailed areas such as the face and body.
- Smoothing: Once the carving is done, use sandpaper to smooth the body, getting rid of tough surfaces and edges.
- Finishing: Protect the wood and enhance its shine with a lacquer of your choice. This not only makes the wood look better but also helps in preserving the carving.
- Tools: Power tools might be necessary for detailed work due to the wood’s density. If you use manual tools they will need to be very sharp to cut through the hardness.
- Care: Handle the wood with care to prevent chipping or breaking, given its high density and hardness.
- Grain Direction: Pay attention to the grain direction while carving. Cutting with the grain can make the process smoother, whereas cutting against the grain can lead to tearing and rough surfaces.
- Incremental Steps: Work in small, incremental steps, gradually removing wood. This methodical approach is particularly useful with hard, dense woods to avoid mistakes that are difficult to correct.
- Temperature and Humidity: Work in an environment with stable temperature and humidity to minimize the wood’s potential to warp or crack due to environmental stress.
- Test Pieces: Practice on smaller pieces of olive wood to get a feel for its behavior under the carving tools you plan to use. This can help you anticipate how the wood will respond on larger projects.
- Patience: Given the density and hardness of olive wood, it’s important to be patient and not rush the carving process. This can prevent accidents and ensure a higher quality finished product.
Olive Wood Carving Project Ideas
Olive wood can be used for both decorative pieces as well as functional items such as bowls, spoons, cups, and more.
Spoons: The smooth surface of the spoon makes it ideal for detailed carvings or simple shapes. You can create ornate handles with intricate details or keep them plain, depending on your preference.
Bowls: Bowls make great centerpieces in any home decor setting, and they are also perfect for serving food at dinner parties or special occasions. With olive wood, you can create beautiful patterns on the sides of the bowl using chisels or other tools to add depth and character to your piece.
Cups: Cups made from olive wood are perfect for drinking tea or coffee in style. They have an elegant look that will stand out among other mugs in your kitchen cabinet collection. Carving these cups requires patience, but with some practice, you’ll be able to craft stunning pieces that will last a lifetime.
Jewelry Boxes: Jewelry boxes make lovely gifts because they are useful and very personal items that show someone how much you care about them by taking time to craft something special just for them.
Olive wood works best here since it’s easy enough to carve yet still strong enough so that delicate jewelry won’t get damaged inside the box over time.
Cheese boards: These make great conversation starters during dinner parties, especially if they come with unique carvings on their surfaces. If you want yours to stand out, consider using olive wood with an eye-catching hue and plenty of room for creative detailing around its edges.
Finishing Olive Wood
Sanding: Although Olive wood is already very smooth, you will still need to do some sanding to finish it. Start with coarse grit sandpaper and work up to finer grits until the surface is smooth. Use light pressure when sanding to avoid damaging the wood grain.
Staining: Staining can be used to enhance the color of olive wood or create a more uniform look. Before staining, ensure all dust has been removed from the surface of the wood by wiping it down with a damp cloth. Then apply the stain using either a brush or rag and allow it to dry before applying any additional coats if desired.
Sealing: Sealing helps protect your finished piece from moisture damage and other environmental factors such as UV rays and dirt buildup. Several types of sealants are available on olive wood, including oil-based polyurethane, water-based polyurethane, shellac, lacquer, waxes, and varnishes.
Each type offers different levels of protection so choose one based on how much protection you need for your project.
Once you have completed all steps above, it is time for the final touches.
Buff any scratches or marks left behind during carving or sanding with steel wool or fine-grade sandpaper. Wipe off any excess dust with a soft cloth and then add protective coatings such as paste wax which will help maintain luster over time while also providing an extra layer of protection against dirt buildup, etc.