If you’re looking to get into wood carving but you’re feeling a bit overwhelmed, don’t worry you’re in good company.
When you’re first starting out, understanding different wood carving techniques can help you to get a foothold. Usually, we find that most carvers end up focussing on one technique that appeals most to them.
I’ve gone in-depth into each technique so you can get a rough overview of each one and pick out the technique that appeals most to you.
Whittling
Whittling is a specific style of wood carving that typically involves the use of a knife to shape raw wood into a particular design or form.
A rather simplistic and straightforward carving technique, whittling is popularly employed in crafting decorative items, toys, and functional objects, or sometimes simply for leisure.
Unlike some other forms of wood carving that require an array of specialized tools, whittling is lauded for its minimalism, often requiring nothing more than a piece of wood and a sharp knife.
Despite its simplicity, the art of whittling can range from creating basic geometric shapes to more complex and intricate designs, depending on the skill and imagination of the artist.
It’s a technique that encourages experimentation and creativity, and is widely considered a great starting point for beginners in wood carving.
Related: Best Whittling Kits for beginners
How to get started with whittling:
When starting, make sure to choose a softwood such as basswood, cedar, or pine. These types of wood are easier to whittle and will help you develop your skills faster.
With time, you can venture into harder woods that offer more resistance and require greater precision.
As you start whittling, you’ll discover various cuts that serve different purposes. A fundamental technique is the straight cut. Hold the knife at a slight angle and push it through the wood while maintaining control.
Another essential technique is the slicing cut. It involves moving the knife in a slicing motion, similar to cutting a piece of bread. This ensures smoother and faster whittling.
Always pay attention to the wood grain. Going with the grain will result in smoother cuts and help prevent the wood from splitting. Sometimes, you might need to change the direction of your cuts to follow the grain pattern.
Here are a few more tips to help you whittle like a pro:
- Keep your knife sharp for clean cuts and better control.
- Practice varying your grip for different types of cuts
- Be patient and take your time; whittling is a relaxing process.
With consistent practice, you’ll find that whittling can be a delightful way to unwind and develop a rewarding new skill.
Chip Carving
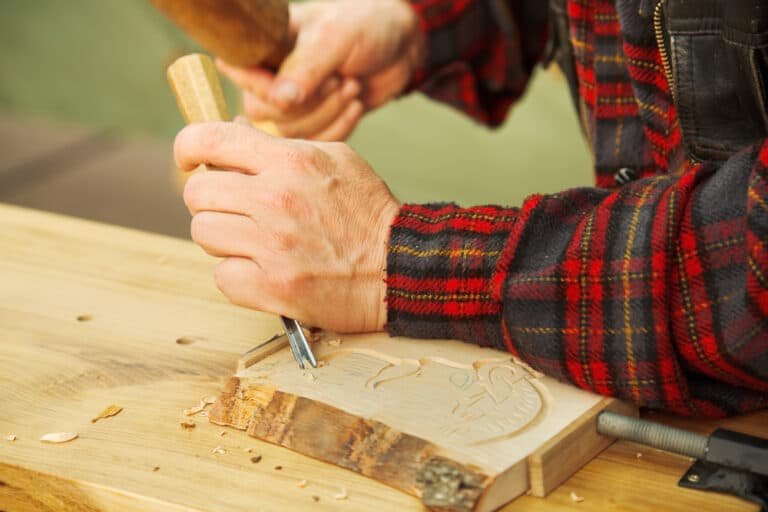
Chip carving is a style of wood carving in which knives, chisels, and gouges are typically used to remove small “chips” of the material from a flat surface in a single piece.
This technique is often used for highly decorative, ornamental carvings. It’s characterized by a set of three cuts that meet in the center to form a chip, hence the name. The resulting pieces are precise and often complex, with a notable regularity and symmetry in design.
There are two fundamental techniques in chip carving: free form and geometric.
- Free Form Chip Carving: This style is often used to carve figures, animals, or other representations into wood. It can be more complex and intricate, and requires a higher level of skill to accomplish successfully.
- Geometric Chip Carving: This form of chip carving involves the creation of geometric shapes, symbols, and designs. The cuts are often straight and precise, and the designs can be repeated to create a pattern.
Tools Needed:
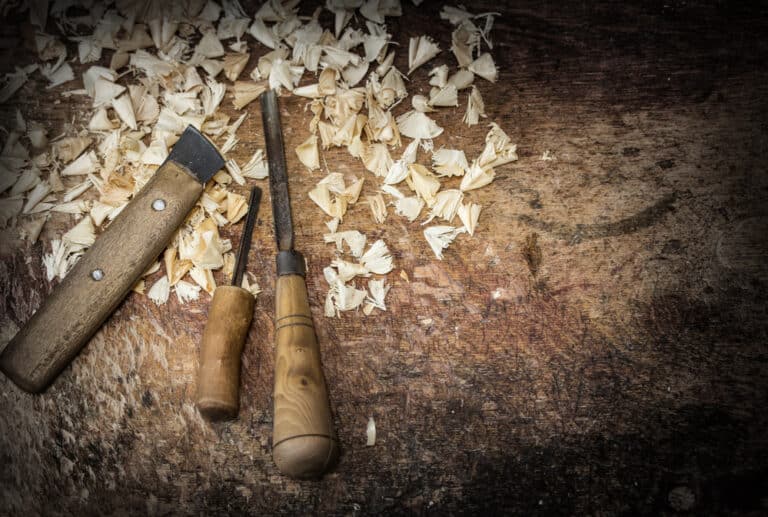
The tools used in chip carving are simple and few, making it accessible to beginners. Basic sets include a chip carving knife (used for making triangular cuts), a stab knife (used for making straight cuts and lines), and often a detail knife (used for removing wood in small areas). If you are starting with a large block of wood an axe can also be helpful to get a rough shape and size.
Wood to use:
While chip carving can be performed on a variety of wood types, basswood is commonly used due to its soft, fine texture. Proper wood preparation and understanding of grain direction is crucial in this technique to prevent the wood from splitting or tearing.
Looking for a chisel? See our top picks here.
Relief Carving
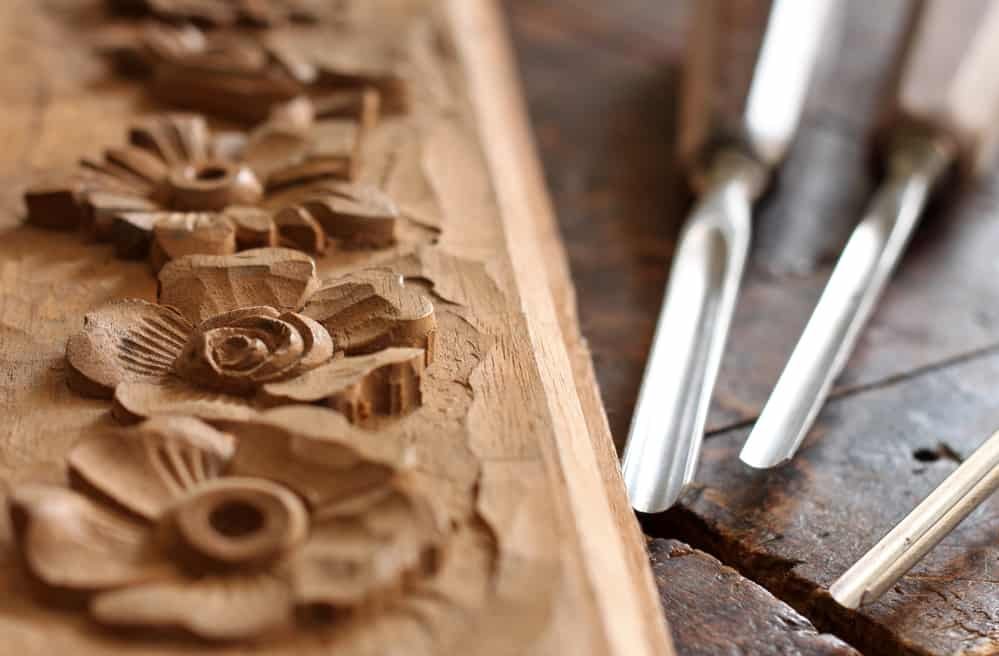
Relief carving is a type of wood carving technique in which figures are carved in a flat panel of wood. The figures project only slightly from the background rather than standing freely or being detached from it.
Depending on the degree of projection, reliefs are classified as high relief (or alto-relief), low relief (or basso-relief), and sometimes an intermediate form called mezzo-relief.
Wood to Use
To start, choose a suitable wood for relief carving. Basswood or Jelutong are great options for beginners due to their softness and easy workability. Make sure the wood is free from warping and well planed.
Spoon Carving
Spoon carving is a specialized form of wood carving that focuses on the creation of wooden spoons. This traditional craft has been practiced for centuries and is still popular today.
Spoon carving is distinct in its focus on both the functional and aesthetic aspects of the spoon. This includes the shape of the spoon’s bowl and handle, as well as decorative elements that may be carved into the handle or the back of the bowl.
The process of spoon carving typically begins with selecting a suitable piece of wood. Green wood, or wood that is still relatively fresh and not fully dried, is often used because it’s easier to carve.
Wood to Use:
Traditionally, a variety of woods can be used for spoon carving, but some of the more popular choices include birch, beech, and cherry.
Tools Needed:
The tools used for spoon carving are relatively simple. A spoon carving knife, or hook knife, is used to hollow out the bowl of the spoon. This tool has a curved blade that allows for the efficient removal of wood.
A straight knife is used for shaping the handle and the outside of the spoon’s bowl.
Once the spoon has been carved, it is typically allowed to dry and then finished with a food-safe oil or wax. This helps to protect the wood and extend the life of the spoon.
Spoon carving is often appreciated for the unique, handcrafted spoons it produces, each with its own character. It’s also valued as a craft that can be practiced with minimal tools and materials, making it accessible to a wide range of people.
Carving in the Round
“Carving in the round” is a wood carving technique that involves carving a fully three-dimensional figure out of wood. Unlike relief carving, where the figures are carved into a flat panel and remain attached to it, carving in the round results in a sculpture that can be viewed and appreciated from all angles.
The technique requires a good understanding of three-dimensional forms, and a solid grasp of spatial relationships. The process begins with a block of wood, and the carver gradually removes material until the desired form is achieved. This is different from methods like whittling, where the shape is more often “drawn” out of the wood.
Tools Needed:
A variety of tools can be used in carving in the round, including knives, gouges, chisels, and mallets. The choice of tools depends on the size of the sculpture and the level of detail required. For larger works and roughing out the initial shape, larger tools like saws may be used. For adding details and finishing touches, smaller, precision tools are employed.
Wood to Use:
The type of wood used in carving in the round varies depending on the desired outcome. Hardwoods like oak and mahogany can be used for larger, more durable sculptures, while softer woods like basswood and pine are often used for smaller, more intricate works.
Carving in the round can be used to create a wide variety of objects, from small figurines to large statues. It’s a versatile technique that’s used in many different cultures and artistic traditions around the world.
Intaglio Carving
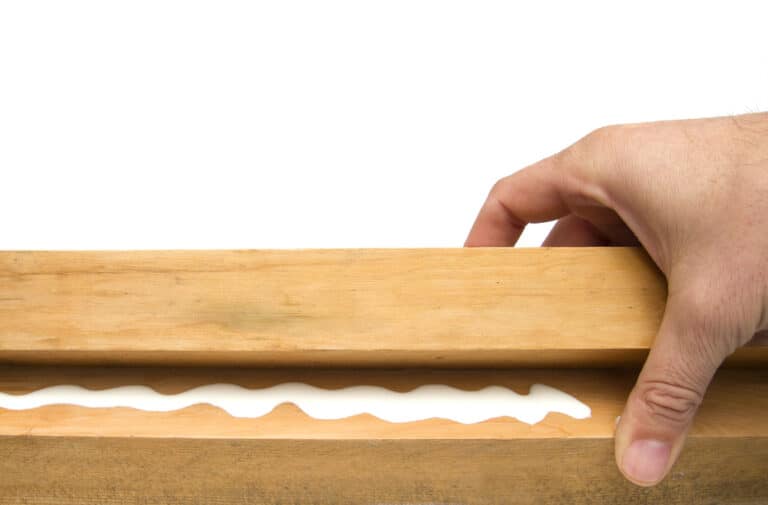
Intaglio carving is a technique of incising or cutting designs into a flat surface. It is essentially the opposite of relief carving, where the design is raised above the background. In intaglio, the design is cut below the level of the surrounding surface.
Intaglio carving is commonly used in printmaking, where an image is incised into a surface, and the incised line or sunken area holds the ink. It is then printed onto paper. However, in the context of wood carving, intaglio refers to designs that are cut into the wood, creating a recessed image.
The process of intaglio carving involves careful and precise cutting, often using a variety of specialized tools such as knives, gouges, and chisels. The depth of the cuts can vary, creating a sense of depth and three-dimensionality within the design.
Intaglio carving can be used to create highly detailed and intricate designs, and it’s often used for decorative purposes, such as in furniture or architectural elements. Despite its complexity, it can produce very beautiful and visually interesting results.
Wood to Use:
As with other types of carving, the choice of wood in intaglio carving can have a significant impact on the final result. Hardwoods with a tight grain, like maple or cherry, are often preferred for their ability to hold fine detail.
It’s worth noting that intaglio carving requires a good understanding of the properties of wood, as well as a high level of skill and precision. It’s also important to consider the direction of the wood grain when carving to avoid splitting or damaging the wood.
Letter Carving
Letter carving is a specialized form of wood carving that involves inscribing letters or numbers into wood. This technique is often used to create signs, plaques, and personalized items such as nameplates or monograms.
Letter carving requires precision and attention to detail. Each letter or number must be carefully planned out and executed. The carver usually starts by sketching the letters onto the wood, then uses a variety of tools to carve out the design. The choice of tools depends on the size and style of the letters, but often includes knives, chisels, and gouges.
The style of the letters can vary greatly, from simple block letters to more elaborate and decorative scripts. The depth of the carving can also vary, from shallow incisions to deep, three-dimensional letters.
One of the main considerations in letter carving is the legibility of the letters. This means that the carver must take care to ensure that each letter is clear and distinct. This can be especially challenging when carving complex or ornate letter styles.
Which Wood to Use:
Hardwoods with a tight grain, such as maple or cherry, are often preferred because they can hold fine detail well. However, softer woods like pine or basswood can also be used, especially for larger or less intricate designs.
Like other types of wood carving, letter carving requires a good understanding of the properties of wood, as well as a high level of skill and precision. It’s also important to consider the direction of the wood grain when carving to avoid splitting or damaging the wood.
Scandinavian Flat-Plane
Scandinavian Flat-Plane carving is characterized by its simplistic, stylized representations of figures and objects, and by its specific technique of carving, in which the wood is carved in large flat planes.
The style was traditionally used to carve figures such as animals, people, and scenes from daily life. The figures are typically carved in a way that leaves the tool marks visible, adding to the rustic, handcrafted aesthetic of the pieces.
In terms of technique, the carvings are typically done using a knife, rather than chisels or gouges. The knife is used to make straight, flat cuts in the wood, creating facets that define the shape of the figure. These facets are often left unsmoothed, which gives the carvings their distinctive, faceted appearance.
The figures are usually carved from a single block of wood, and are often left unpainted, allowing the natural beauty of the wood to show through. However, some carvers do choose to paint their figures, often using bright, bold colors.
Scandinavian Flat-Plane carving is often appreciated for its simplicity and charm. The figures, while not highly detailed or realistic, have a distinctive character and expressiveness that is unique to this style of carving.
Netsuke
Netsuke is a form of miniature sculpture that originated in Japan. These small, intricate carvings were traditionally used as toggles to secure small personal items such as money pouches, inro (small cases for holding personal effects), or tobacco containers to the obi (sash) of a kimono.
Traditional Japanese garments lacked pockets, so these items were hung by cords from the obi, with the netsuke attached to the other end of the cord to prevent the cord from slipping through the obi.
Netsuke are typically only a few inches in size but are often highly detailed and depict a wide variety of subjects, including people, animals, plants, and mythical creatures, as well as scenes from Japanese folklore and everyday life.
Netsuke are traditionally carved from a variety of materials, including ivory, bone, and various types of wood. The choice of material can depend on the desired aesthetic, the carver’s skills, and the intended use of the netsuke.
The technique of carving netsuke requires a high level of skill and precision due to the small size and often intricate detail of the carvings. Various tools are used in the carving process, including knives, chisels, and files.
In the present day, netsuke are often collected as works of art and are appreciated for their craftsmanship, detail, and the insight they provide into Japanese culture and history.
Power Carving
Power carving is a great technique for beginners to start their wood carving journey. With power carving, you’ll be using motorized equipment that rotates a shaft with a cutting bur mounted on the end. A dremel is a great option.
The advantages of power carving over traditional hand carving are numerous. For instance, power carving allows you to work faster and achieve better precision. It’s also easier on your hands and muscles, making it a more comfortable experience.
To begin power carving, pick a simple pattern or design that interests you. Leaves are a forgiving option for beginners, as their organic shapes can be adjusted easily if a mistake is made. Remember, practice makes perfect, so don’t be afraid to experiment and learn from your initial projects.
Here are some tips and techniques to help you get started with power carving:
- Choose the right tool and attachment: Depending on the level of detail required for your project, select appropriate tools and attachments. For example, use a high-speed cutter for larger areas, while engraving cutters and tungsten carbide cutters are perfect for finer details.
- Use a comfortable grip: Holding your power carving tool comfortably is crucial to maintain control and prevent fatigue. Experiment with different grips and positions to find what works best for you.
- Start with a low speed: Begin your project by setting your tool at a low speed to prevent unintentional cuts and gain better control. You can gradually increase the speed as you become more comfortable and confident.
- Carve with the grain: When carving with power tools, it’s still important to follow the direction of the wood grain. This will ensure smoother cuts and help prevent unwanted chipping or splitting.
- Safety first: Ensure you wear safety goggles, a dust mask, and hearing protection when using power carving tools. It’s essential to protect yourself from dust, debris, and the noise generated by power tools.
Green Wood Carving
Green wood can be an excellent choice for beginners. As its name suggests, green wood is freshly cut and not fully dried yet, which makes the carving process smoother. The moisture within the wood lubricates the turning tool, keeping it cool and easy to handle, unlike dry wood, where carving tools heat from the friction between the wood and the carving tool.
Before you begin, make sure to gather the necessary tools such as a carving knife, spoon knife, or gouge, depending on the project you want to create. Sharp tools are essential to ensure precision, control, and safety during carving.
To begin with green wood carving, follow these steps:
- Choose a suitable type of green wood. Some hardwoods, like oak or maple, are denser and may be more challenging to work with, while softer woods like basswood or pine are more forgiving for beginners. Green wood is commonly preferred by spoon carvers because it is much more easily whittled.
- Split the wood. Use a tool like a hatchet to split your green wood into smaller, manageable pieces. This will ensure that you have an ideal starting point for your carving, allowing you greater control and stability.
- Create a rough outline. Sketch out the design of your project on the green wood using a pencil. This will give you a clear direction to follow as you start carving, minimizing the risk of mistakes.
- Begin carving. Using your sharp carving tools, start to remove wood by carefully following the outline you’ve drawn. Use long strokes for large cuts and take your time to avoid splitting or damaging the wood.
- Refine your carving. After your initial carving, use different types of tools, like a spoon knife or gouge, for hollowing or adding details. Always keep your tools sharp, and use a steady hand to create the final shape.
When working with green wood, remember that it will eventually dry out and shrink, so it’s crucial to plan your project accordingly.
What is the Easiest Wood Carving Technique for Beginners to get started?
Whittling is the simplest and most accessible form of wood carving for those just starting out.
Throughout your whittling journey, focus on these factors:
- Patience: Wood carving is a slow and methodical process, so don’t rush things.
- Practice: As with any new skill, practice makes perfect. Dedicate time to whittling every day to improve your techniques.
- Safety: Always prioritize your safety, from avoiding injuries to properly maintaining your tools.